
Once you finish a temple in Tears of the Kingdom, a glowing blue friend starts following you around Hyrule. That is a Sage avatar, and each one has a power that can turn a messy fight or a tricky climb into something way easier. If you’re just starting out, don’t stress: using them is simple once you know the trick.
This guide covers every Sage ability, how to trigger and toggle them, how to upgrade them with Sage’s Wills and which ones are worth keeping out. Heads up: light spoilers for the main quests.
All Sage Abilities at a Glance
| Sage | Temple | Power | Best for |
|---|---|---|---|
| Tulin (Rito) | Wind Temple | A forward gust of wind | Longer glides, pushing enemies back |
| Yunobo (Goron) | Fire Temple | Launches himself as an exploding fireball | Breaking rock, burst damage, lighting fires |
| Sidon (Zora) | Water Temple | A water shield that blocks one hit | Defense, wet weapons, water shots |
| Riju (Gerudo) | Lightning Temple | Arrows call down lightning | Groups and big enemies at range |
| Mineru | Spirit Temple | A rideable Construct body | Heavy fighting and Fuse on her arms |
How to Use Sage Powers
Here’s the chill version: you do not press a special button anywhere on the map. You walk up to the Sage avatar and press A when the prompt appears.
- Tulin is the exception: his gust also triggers with A while you are paragliding, as long as he is out.
- Cooldowns: each Sage recharges separately. When an avatar is ready, you can interact with it again; while recharging, there is no prompt.
- Summon or dismiss: each Sage gives you a Vow in your Key Items. Select a Vow to turn that Sage on or off.
No Stress: having all of them out at once can get chaotic, especially with several prompts stacked on top of each other in a fight. Turning off the ones you are not using is totally fine.
What Each Sage Actually Does
Tulin: Sage of Wind
Tulin shoots arrows at enemies on his own. His power is a gust that shoves objects and lots of enemies away from you, and its real magic is mobility. Fire it while paragliding and you get a forward push that stretches every glide. Honestly? This is the one most people keep on all game.
Yunobo: Sage of Fire
Press A near Yunobo and he curls up; press again to launch him in the direction you are facing. He explodes on contact with an enemy or any surface. That breaks cracked rock and ore deposits, which makes him great in caves, and the blast lights grass and wood on fire for extra damage.
Sidon: Sage of Water
Activate Sidon and Link gets a water shield that blocks a single hit before it pops. You can also spend the shield on offense by swinging your weapon, which fires a water shot: small and piercing with spears, a wide wave with two-handed weapons. The water also makes your weapon wet for a few seconds, and the Water Warrior property doubles a weapon’s attack while wet.

Riju: Sage of Lightning
Activate Riju and an electric field grows around you. Fire an arrow while inside it and lightning strikes where the arrow lands. Okay but this part is so good: it shreds groups and big targets like Hinoxes from range. You need a bow, so keep arrows stocked.
Mineru: Sage of Spirit
Mineru works differently. Instead of an ally who fights next to you, she is a Construct body you climb into and pilot, and you can fuse items to her arm for different attacks. She is slower to set up, but she hits hard.
Upgrading Your Sages with Sage’s Wills
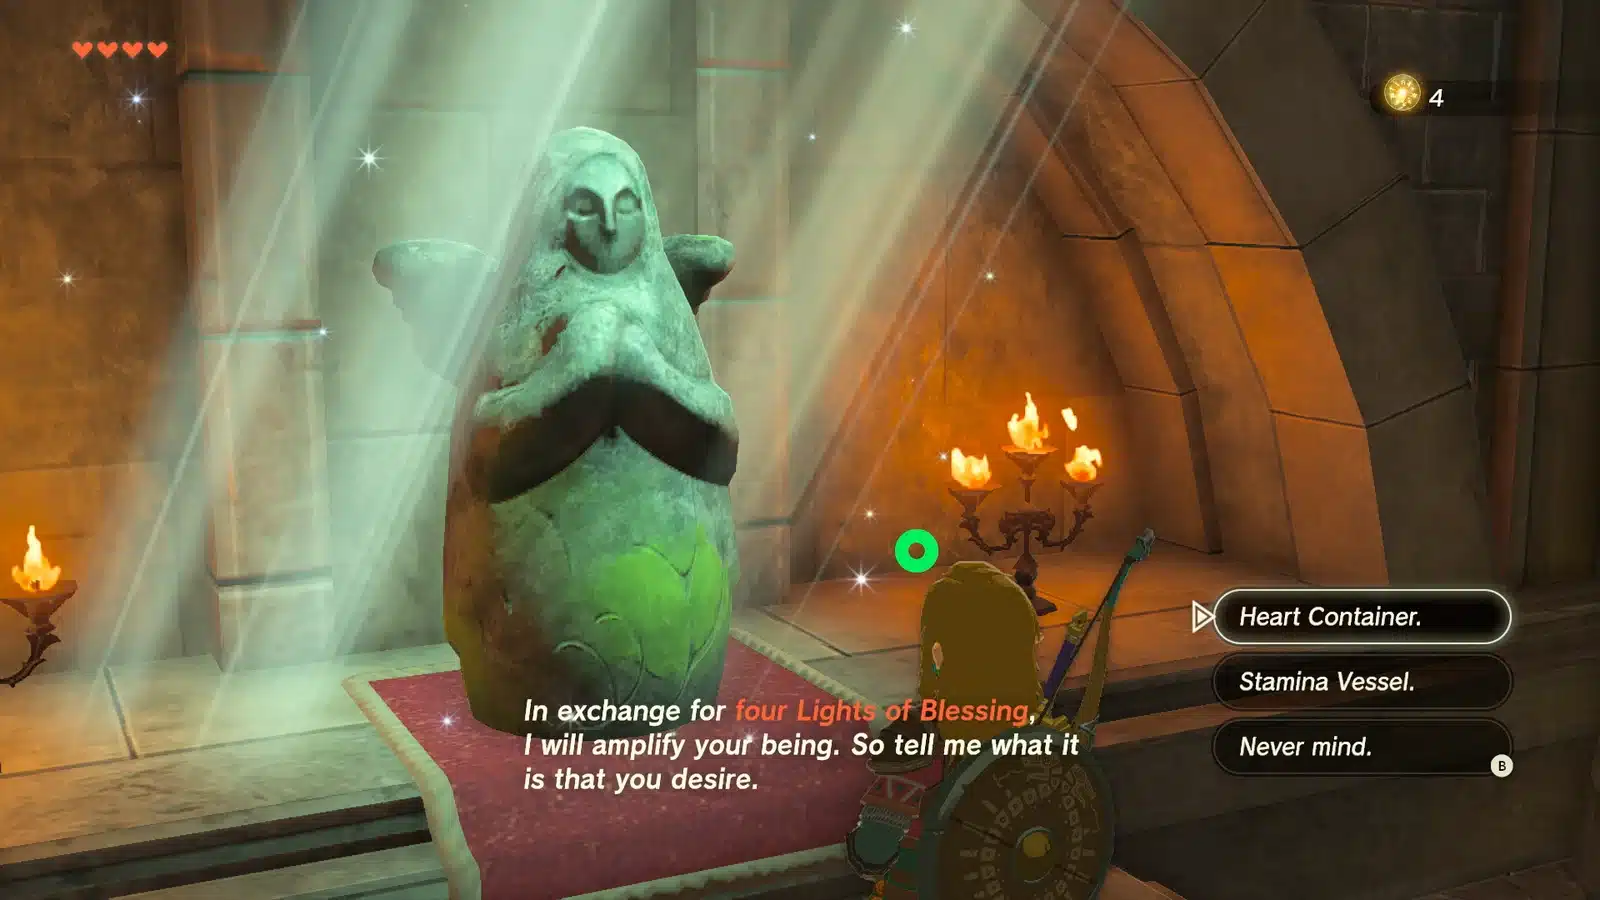
There are 20 Sage’s Wills hidden in treasure chests around the sky islands. Take four of them to any Goddess Statue, pray, and pick a Sage to strengthen.
| Item | Amount |
|---|---|
| Sage’s Wills in the game | 20 |
| Wills per upgrade | 4 |
| Upgrades per Sage | 1 (Vow becomes a Solemn Vow) |
The upgrade turns a Vow into a Solemn Vow and makes that Sage’s avatar hit harder in combat. Guides put the boost at around 1.3 times, the same for every Sage. If you can only do one early, Yunobo is a popular pick because his launch already hits so hard.
Tips for Getting the Most Out of Your Sages
- Glide farther: Tulin’s gust while paragliding covers a lot of ground for very little stamina.
- Cave clearing: send Yunobo into rock walls and ore deposits instead of hunting for bombs.
- Big fights: raise Sidon’s shield before you engage, then decide whether to keep it as a buffer or fire it as a wave.
- Ranged builds: Riju plus a multishot bow is a party. Our Fuse guide covers the best arrow materials to pair with her.
- Build around Mineru: her Construct pairs nicely with the parts you already use for Autobuild and Ultrahand projects.
Trust me on this: swap Sages to fit the moment. Tulin for exploring, Yunobo for caves, Riju for camps, Sidon when you keep getting knocked down. If you are hunting the temples and sky islands, the Tears of the Kingdom interactive map helps, and if you are playing on newer hardware, our TotK Switch 2 Edition review covers what changed.
Sage Abilities FAQ
How do you use Sage abilities in Tears of the Kingdom?
Walk up to the Sage avatar and press A when the prompt shows. Tulin’s gust can also be used with A while paragliding.
How do you turn Sages off?
Open Key Items and select that Sage’s Vow. Select it again to bring them back.
How many Sage’s Wills do you need?
Four per upgrade. There are 20 in total, enough to upgrade each of the five Sages once.
Which Sage is the best?
Tulin for exploring and Yunobo for damage are the most common picks, but Riju is excellent for bow players.
The Payoff: once you get used to calling on your Sages, Hyrule starts to feel like a team effort. Grab those Sage’s Wills when you see a chest in the sky. You’ve got this.