
Lasers. Trap doors. Your dignity on the line. Sahirow Shrine looks like Link auditioning for a heist movie, and half of you are about to faceplant through the floor.
Not on my watch. Here’s the play: jump, crouch, Ascend, Ultrahand, done. You’re welcome.
Sahirow Shrine Location in the Hebra Mountains
This puzzle shrine sits on the Hebra Mountains surface, way up in the frozen northwest. Getting there is easy if you pick the right route.
- Coordinates: (-3355, 2387, 0361).
- Landmark: Look near the top of Corvash Peak, east and a little north of Rospro Pass Skyview Tower.
- Route 1 (Glide): Launch from the Rospro Pass Skyview Tower and paraglide over. Fast, clean, zero cardio.
- Route 2 (Climb): Start at Hebra Trailhead Lodge, north of Rito Village, and climb up from the valley.
- Shrine Name: Aid from Above. Remember that name, because Ascend is the star of the show.
(Pro tip: Pack cold-weather gear or some warming food before you leave. Hebra doesn’t care about your feelings.)
Aid from Above Walkthrough: Step by Step
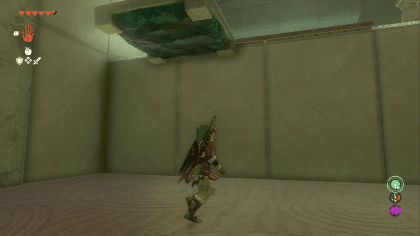
The whole shrine is laser puzzles. Touch a laser and a trap door opens under Link, which means damage and a restart. Almost every laser can be dodged with a jump or a crouch.
- Step 1: Run down the first hallway and jump over the single red laser. Run, then hit jump. That’s it.
- Step 2: In the next hallway, jump the first laser the same way.
- Step 3: Click the left stick to crouch, then crouch-walk under the next four lasers. The first one looks low, but Link’s crouch clears it.
- Step 4: Click the stick again to stand, jump up the stairs, and paraglide over the final lasers.
- Step 5: Look up. You’ll spot a moving platform with a rough stone texture. Open the R button wheel, select Ascend, and tap R again to pop up through it.
- Step 6: Turn right on top of the platform. You’ll see a locked gate, and that’s the treasure chest. Hold that thought.
If you’re still walking face-first into lasers… we need to talk.
Cracking the Chest Room
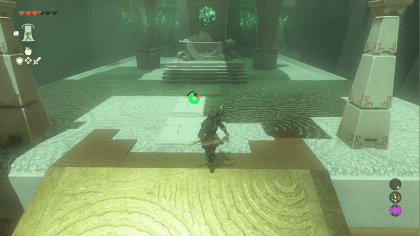
One laser here controls both the gate and a trough in the floor. Your job is to block it.
- The Block: Use Ultrahand to grab the block from across the way.
- The Block’s Spot: Move it into the laser’s path. The gate opens.
- The Chest: Jump on top of the block, then paraglide to the chest. Inside is a Spicy Elixir.
- The Return: Grab the same block and carry it back with you to continue toward the main shrine.
(Pro tip: Don’t ditch that block early. You’ll want it for the trip back.)
Moving Lasers and the Final Grid
The next two areas use the same tactics, but the lasers move. Jump the first one, duck the second, and do it while they’re coming toward you, not away from you.
Timing matters more than speed here. Let them close the distance, then react.
The final room throws a whole grid of lasers at you, and you can’t dodge it with a crouch. So you don’t dodge it, you outplay it.
- Chase the Grid: Follow it closely as it moves away from you.
- Watch the Far Side: When the grid reaches the far wall, it turns around.
- The Hop: At that moment, or just before, jump in the air and get up on the ledge.
- The Finish: When you reach the top of the rectangular arch, jump from it and glide on toward the altar to finish the shrine.
Hit the altar and boom. Shrine cleared.
Rewards: What You’re Taking Home
- Light of Blessing: Collect four of these to trade for a Heart Container or Stamina Vessel upgrade.
- Spicy Elixir: Found in the chest, and great for cold-weather runs back in Hebra.
- Fast Travel Point: The shrine unlocks a new warp spot on your map.
Pro Tips for a Clean Run
- Stop Doing This: Sprinting blindly into lasers. Every miss opens a trap door and sends you back to the start.
- Crouch Reminder: Click the left stick in to crouch, and click it again to stand. Forgetting to stand up is a classic rookie move.
- Ascend Check: If you can’t find the spot, look for the platform with the rough stone texture. That’s your ceiling.
- Glide Smart: Use the Skyview Tower launch point to reach the shrine without freezing your face off.
- Patience Wins: Moving lasers don’t reward panic. Wait for them to come at you, then react.
Why This Shrine Matters
Sahirow is a quick, satisfying clear that teaches you three things: timing, crouching, and using Ultrahand to bend a puzzle to your will. It also hands you a Light of Blessing, which is the real prize.
Plus, you get to feel like a secret agent for about five minutes. That’s a win.
GG. You just cleared Aid from Above without eating a single trap door. So tell me: did you glide in from the tower or climb up from the valley? Drop your route in the comments, and let’s see who’s got the cleanest run.