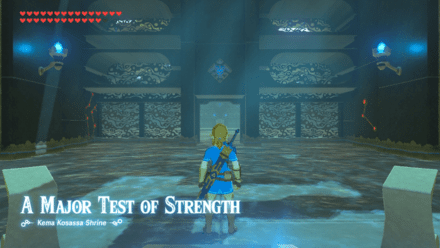
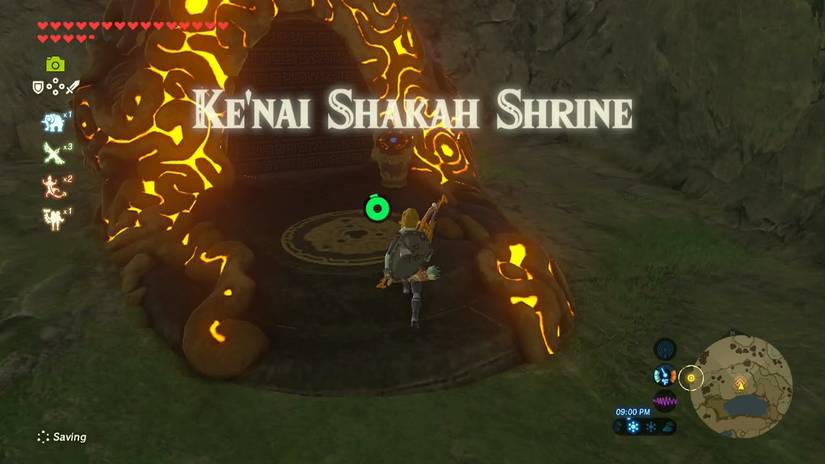
Ever stared at a cliff in Akkala and wondered why light was leaking through the rock? That glow is Ke’nai Shakah Shrine, and it’s hiding in plain sight. Let’s break it down so you can find it, crack it open, and beat the little Guardian waiting inside.
Quick beginner note: this is a Test of Strength shrine, so there’s no puzzle to solve. It’s a straight-up fight, and the trick is knowing what the Guardian does and when. Here’s exactly what to do.
Where to Find Ke’nai Shakah Shrine
The shrine sits in the Akkala region, in eastern Hyrule, tucked into the cliffs around the Ulria Grotto. The grotto is a body of water northeast of Zora’s Domain and toward the south of Akkala, near the Lanayru Sea.
- Region: Akkala (the Akkala Tower area), eastern Hyrule.
- Landmark: Ulria Grotto. The shrine is built into the north wall of the grotto, behind a rock face.
- Nearest shrine: Dah Hesho. From there, head southeast along the grasslands to reach the grotto.
- Shrine type: A Modest Test of Strength (that’s the official trial name).
- Enemy: Guardian Scout III wielding a Guardian Sword+ and an Ancient Battle Axe+, with 1,500 health. Both weapons are yours when it falls.
- What you need: a bow, a paraglider, and bomb arrows (or another way to blow up the wall).
Worth noting: the entrance is hidden. If you walk the lakeshore looking for a door, you won’t find one. Look up instead.
Lore Note: Shrines like this one were built by the ancient Sheikah. Their Guardian Scouts double as combat trainers, there to test whether a hero is ready for what’s coming. That makes this fight a small taste of the Guardian threat you’ll face elsewhere in Hyrule.
Step-by-Step: Reaching the Shrine and Beating the Guardian
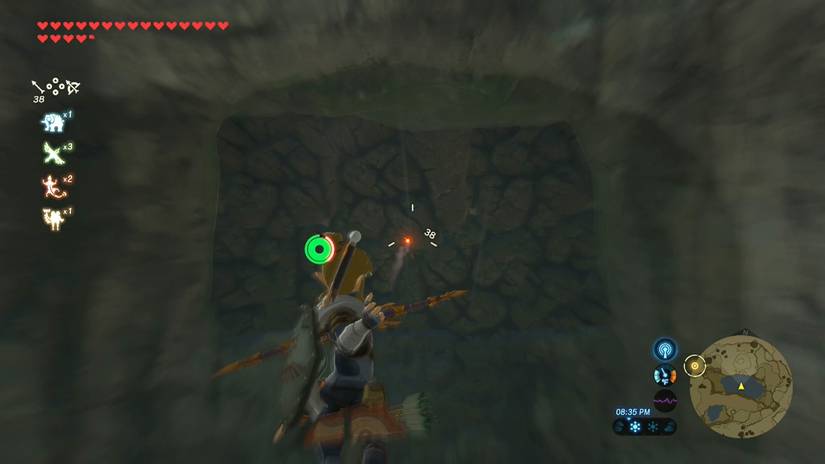
Follow these steps in order and you’ll be inside in a few minutes. The fight is where you’ll want to slow down and pay attention.
Part 1: Getting In
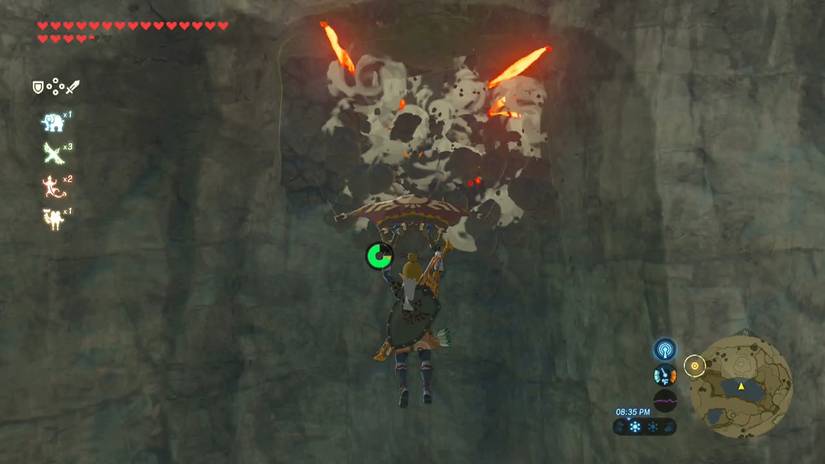
- Step 1: Travel to the Ulria Grotto. If you’re coming from Dah Hesho Shrine, head southeast across the grasslands until you reach the water.
- Step 2: Climb onto the grassy cliff on the south side of the grotto. Face north, back across the water.
- Step 3: Look at the far wall. You’ll see a cluster of rocks that looks weaker than the cliff around it, with light shining through from the shrine behind it.
- Step 4: Jump off the cliff and open your paraglider (if you’re new, that’s the glider you get early in the game). Aim for the cracked rocks.
- Step 5: While you glide, draw your bow and fire a bomb arrow at the wall. The rocks crumble and reveal an opening.
- Step 6: Land, climb up if you need to, and walk through the gap into the shrine.
(Pro tip: bomb arrows are sold in most villages. Other explosives can break the rocks too, but arrows let you stay in the air and skip a lot of climbing.)
Part 2: Beating the Guardian Scout III
Inside, you face the toughest Guardian Scout variant. Here’s what the stats actually mean: with 1,500 health and two weapons, it takes a lot of hits to bring down and punishes sloppy dodging. Use a strong weapon and good armor to shorten the fight.
- Step 7 (Prep): Before you enter the arena, wear your best armor and equip your strongest weapon. Ancient (Guardian) weapons deal heavy damage here. An attack-boosting elixir helps a lot.
- Step 8 (Phase 1): The Guardian swings its sword and axe in combos. Dodge sideways, wait for it to finish, then rush in. A Flurry Rush (a slow-motion barrage you trigger by dodging at the last moment) lets you land a lot of damage in one opening.
- Step 9 (Whirl attack): After a few strikes, it often spins in a whirling attack. Back off, let it finish, then dash in for a few more hits.
- Step 10 (Halfway point): Around half health, the Guardian hunkers down and sweeps a laser around the room. Don’t stand and trade blows. Back away and use the updraft to glide over the Guardian, then strike it from above.
- Step 11 (Final phase): Near the end, it charges up a laser attack and fires four shots in a row. If its health is low enough, rush in and finish it before it fires. If it’s still healthy, run and dodge the shots, then punish it afterward.
Elemental arrows also help when you need to attack from range, such as while the laser is sweeping. That’s a safe way to chip away at its health.
Rewards and Benefits
Beating the Guardian is worth the effort. You get two things from this shrine.
- Treasure Chest: Open the chest in the shrine to get a Sapphire. It sells well and is useful as a crafting or cooking-adjacent valuable, so don’t skip it.
- Spirit Orb: Speak with the monk, Ke’nai Shakah, to receive a Spirit Orb.
- Long-term value: Trade four Spirit Orbs at a Goddess Statue for either a Heart Container or a Stamina Vessel, so every shrine moves you toward a stronger Link.
Lore Note: The shrine monks are what remains of the Sheikah’s ancient trials. Each one blesses you with a Spirit Orb as proof you’ve passed the test. The shrines are the Sheikah’s way of preparing a champion to face Calamity Ganon.
Pro Tips
- Beginner Tip: Practice your dodge timing on weaker Guardian Scouts first. A well-timed sidestep is the key to triggering Flurry Rush.
- Cook Ahead: Bring food that restores hearts, plus an attack-boosting elixir. A single dish can turn a close fight into an easy win.
- Use the Updraft: The updraft in the arena is the safest answer to the laser sweep. Glide over, then strike while the Guardian is exposed.
- Watch the Laser Tell: The charge-up for the final laser is obvious. If you can’t finish it fast enough, back off and wait for the four shots to end.
- Bring Backup Weapons: Two weapons and 1,500 health mean a lot of swings. Carry spares so you aren’t stuck punching mid-fight.
- Stay Mobile: Never stand still while the Guardian charges up. Circle around it, then dash back in after each attack.
(Pro tip: if the fight feels rough, retreat out of the arena, restock food, and try again. Health and gear matter more than speed here.)
Why Ke’nai Shakah Shrine Matters
This shrine is a great check on how well you understand Breath of the Wild’s combat. It teaches you to read an enemy’s patterns, use the environment, and decide when to attack and when to back off. Those skills carry over into every Guardian fight in Hyrule.
It’s also a neat example of the game rewarding curiosity. A glowing wall, a bow, and a glide are all it takes to find a hidden shrine. And since Akkala has several nearby shrines, you can pair this one with Dah Hesho for an efficient trip.
How did your Guardian fight go? Did you beat the laser phase by gliding, or did you take a different approach? Share your strategy in the comments, and let me know which shrine you want covered next!