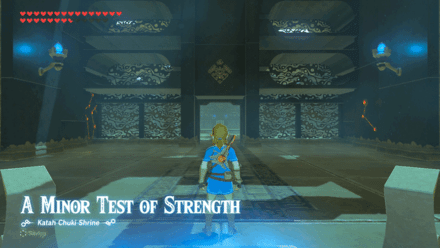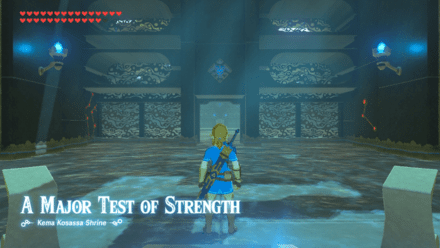
Hey, friend, and welcome. If you’ve been trudging through the Gerudo Highlands with chattering teeth and wondering whether that little shrine icon is worth the trek, I’ve got good news. It absolutely is, and there’s no wrong way to approach it.
The Kema Kosassa Shrine skips the puzzle entirely and drops you into a one-on-one fight with a Guardian Scout IV. Take it at your own pace. I’ll walk you through every step, including the silver rupee chest that’s easy to forget once the fight is over.
Where to Find Kema Kosassa Shrine
You’d expect the Gerudo region to be all sand and sunshine. This shrine, though, sits in the snow-covered Gerudo Highlands, so dress accordingly.
- Region: Gerudo Highlands, in the southwest part of the Gerudo region.
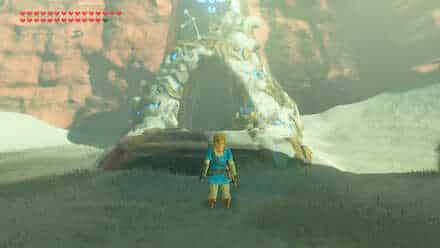
- Exact Spot: Risoka Snowfield, at the center of the foot of Mount Agaat. It’s tucked behind a slope at the bottom of a cliff.
- Shrine Type: Test of Strength. It’s a combat trial, not a puzzle room.
- Access: There’s no puzzle or enemy camp guarding the entrance. Slide the tablet in and go.
- Fast Travel Tip: Warp to Gerudo Tower, then glide northwest to skip a good chunk of the journey.
- Prep Needed: Cold resistance, plus a small climb near the end.
Take Your Time: The snowfield is beautiful and quiet, and it’s a nice place to slow down. Cook a few cold-resistant meals before you head out, and the whole trip feels a lot cozier.
Here’s a quick checklist you can keep handy while you play.
| Checklist Item | How to Get It | Done? |
|---|---|---|
| Shrine Discovered | Risoka Snowfield, foot of Mount Agaat | ☐ |
| Guardian Scout IV Defeated | Beat the 3,000 HP guardian inside | ☐ |
| Silver Rupee Chest | Open the chest after the fight | ☐ |
| Spirit Orb | Speak to Monk Kema Kosassa | ☐ |
Kema Kosassa Shrine Walkthrough: Step by Step
This fight looks scary on paper. Once you learn its rhythm, though, it’s very manageable. Here’s the whole thing in order.
- Step 1: Gear up before you leave. Bring your strongest weapons, shields, and armor, and pack plenty of healing food. The Guardian Scout IV hits hard with its spear, sword, and axe.
- Step 2: Head to the Risoka Snowfield and find the shrine behind the slope at the foot of Mount Agaat. Climb down the cliff and slide your Sheikah Slate against the pedestal to enter.
- Step 3: Take a breath before engaging. The battle takes place in shallow water, which matters for one of the best tricks in this fight (more on that below).
- Step 4: Dodge the opening laser attack. Right after it fires, jump in with a Flurry Rush to deal heavy damage while the guardian is off balance.
- Step 5: Keep dodging and counterattacking. Watch the guardian’s arm swings and wait for a clean opening before you strike back.
- Step 6: Around the halfway point, the guardian hunkers down and spins a laser around the arena. Back off, then use the updraft to glide over it and strike it from above.
- Step 7: Near the end of its health bar, the guardian charges up one last laser. If it’s low enough, rush in and finish it before it fires. If its health is still high, run and dodge the multiple shots instead.
- Step 8: Once it’s down, open the chest for a silver rupee. Then speak to Monk Kema Kosassa to collect your spirit orb.
Easily missable, so heads up: After a tense fight, it’s tempting to run straight to the monk. Grab that silver rupee chest first, so your checklist stays clean.
(Pro tip: If a fight goes badly, you can restart it. A rough first try is just practice for the second.)
Rewards and Benefits

The payoff here is small but satisfying. Every shrine counts toward your overall progress.
- Spirit Orb: Given by Monk Kema Kosassa. Trade four at a Goddess Statue for a Heart Container or a Stamina Vessel.
- Silver Rupee: Found in the chest after you defeat the guardian. It’s a nice little bonus for your wallet.
- Shrine Progress: Another shrine marked off, and one more in the Gerudo Highlands region, which holds six in total.
- Fast Travel Point: The shrine becomes a warp spot in a cold, remote corner of the map, which is very handy.
Pro Tips for the Guardian Scout IV Fight
- Use Cryonis: Since the fight happens in shallow water, you can raise ice pillars. Position yourself so the guardian runs into one and gets stunned. That’s your best window for big damage.
- Flurry Rush Is Your Friend: Dodge at the last second, and the slow-motion rush lets you land a string of hits. Aim it right after the opening laser.
- Bring Variety: The guardian wields a spear, sword, and axe, and each one hits differently. Having different weapons and health options on hand keeps you flexible.
- Stay Mobile: Don’t stand still and trade blows. Dodging and hitting back is more reliable than going toe to toe.
- Respect the Updraft: When the guardian starts spinning its laser, glide over it rather than trying to outrun it. It’s a safe and satisfying way to get the upper hand.
- Read the Final Laser: Low health means rush it down. High health means keep dodging until the shots end.
(Pro tip: Eat a hearty meal before you step in. Extra hearts are a gentle safety net while you learn the guardian’s patterns.)
Take Your Time: If you get defeated, that’s completely okay. Every attempt teaches you something about its timing, and the shrine will be waiting for you.
Why This Shrine Matters
You’d be surprised what’s hiding in the side content. A shrine like this might feel like a quick detour, but it’s a small test of the skills you’ve been building all game. Dodging, Flurry Rush, and smart use of your runes all come together in one tidy fight.
Lore Connection: Guardians are tied to the Great Calamity from a hundred years before your adventure. Facing one in a calm, controlled shrine setting is a quiet reminder of how far Hyrule’s ancient technology has come, and how it was turned against its own people. Beating one here is a nice moment of reclaiming that history.
It’s a marathon, not a sprint. Each spirit orb you collect brings you closer to another Heart Container or Stamina Vessel, which makes the rest of your journey a bit easier. For the record, I checked every single one of these Gerudo Highlands shrines, and this is a lovely one to start with.
So how did your fight with the Guardian Scout IV go? Did you use Cryonis to stun it, or did you go all in with Flurry Rush? Share your strategy in the comments, and let me know which shrine you want to tackle together next.