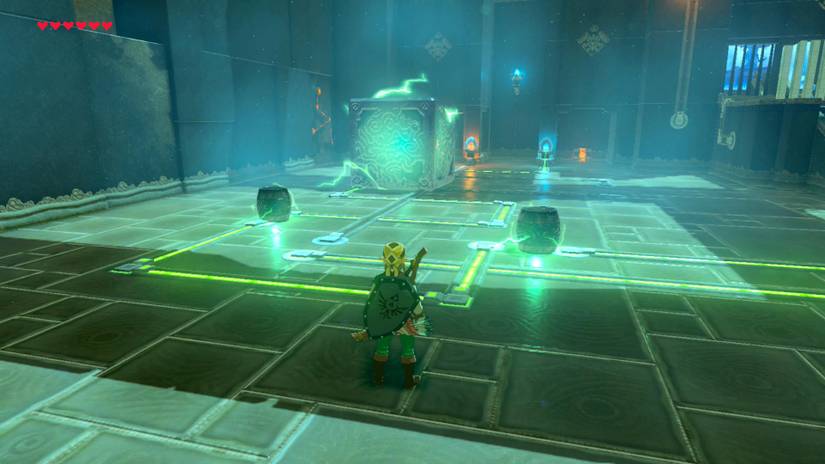
Standing in a Shrine full of glowing floor lines and a silent electric pylon, you might wonder where to even start. Good news: Daqo Chisay Shrine looks like a wiring diagram, but it plays like a neat little logic puzzle.
This walkthrough gives you the exact order of moves, plus the reasoning behind each one so you can solve it yourself next time (don’t worry, it’s simpler than it sounds). Grab your Magnesis Rune and let’s route some electricity.
Daqo Chisay Shrine Location and Overview
Daqo Chisay Shrine, also called The Whole Picture, sits just outside Gerudo Town in the Gerudo Wasteland region. It’s an easy one to grab early, since you’ll almost certainly pass it on your way into town.
- Location: To the left of the main entrance to Gerudo Town, in the Wasteland region.
- Shrine Name: The Whole Picture (the monk inside is Daqo Chisay).
- Puzzle Type: Electric circuits. You complete glowing lines on the floor and on platforms using metal objects as conductors.
- Required Rune: Magnesis. You’ll use it constantly, so make sure it’s equipped from your Sheikah Slate.
- Treasure: One chest containing a Thunderblade, plus the Spirit Orb at the end.
(If you’re new to this: Magnesis is a Rune that lets you pick up metal objects and move them freely with your motion or stick controls. Think of it as a magnetic grabber for anything shiny.)
Lore-wise, the Sheikah designed these Shrines as trials for a hero to prove their worth. Gerudo Town’s own technology leans on lightning and the desert’s harsh climate, so an electricity-themed trial fits the neighborhood nicely.
Your Toolkit: Know the Pieces
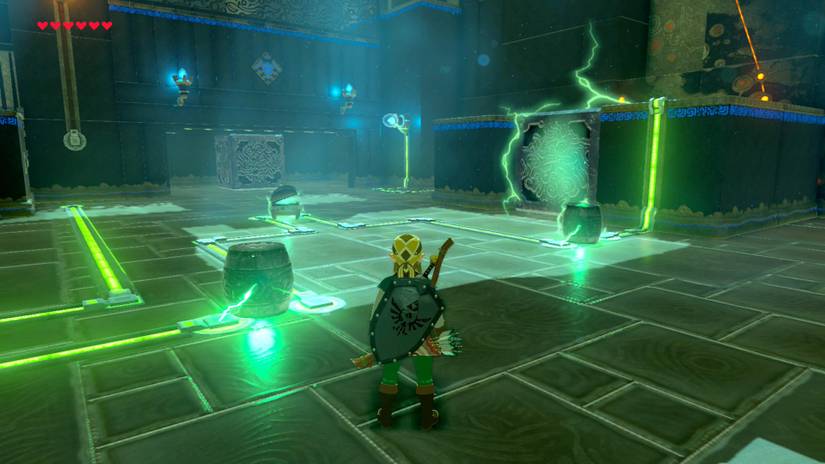
The numbers tell an interesting story: this whole Shrine runs on just three kinds of metal objects. Once you know what each one does, the room stops feeling chaotic.
| Object | Count | Best Use |
|---|---|---|
| Metal Barrel | 2 | Bridges small gaps between circuit pads |
| Large Metal Block | 2 | Bridges wide gaps and finishes the final door |
| Treasure Chest (metal) | 1 | Works as an extra conductor in the second half |
Here’s the key idea: a circuit lights up only when something metal connects its pads. Small gaps take a barrel, and wide gaps take a big block.
Daqo Chisay Shrine Walkthrough: Step-by-Step Solution
When you walk in, an electric pylon sits right in front of you, with circuit lines spreading across the floor and onto nearby platforms. Your goal is to energize every circuit. Here’s the step-by-step:
Part 1: Waking Up the First Circuits
- Step 1: Head down and to the left from the entrance. You’ll find a metal barrel. Equip Magnesis and pick it up.
- Step 2: Guide the barrel along the leftmost glowing circuit until you reach the end of the glow at a small circular pad.
- Step 3: Set the barrel so it sits between that pad and the pad to its right. This completes the link and activates the next circuit.
- Step 4: Follow the new circuit. You’ll notice a wider gap between pads than before, and a barrel won’t cover it.
- Step 5: Use Magnesis on the metal block located to the left of the two barred rooms. Place it between the two circuit pads to bridge the gap.
That connection opens one of the barred rooms, and inside you’ll find a second metal barrel. Now you have two barrels to work with.
(Pro tip: If a circuit isn’t lighting up, check that your object is actually touching both pads. A barrel that’s slightly off to one side won’t conduct.)
Part 2: Opening the Thunderblade Chest
- Step 6: Take your first barrel and move it down to the glowing line to the right of the circuit it currently occupies. This activates yet another circuit line.
- Step 7: Grab the new barrel from the room you just opened. Follow your freshly formed circuit to its end.
- Step 8: Place the barrel between the two small pads at the end. Once again, a new circuit appears.
- Step 9: Take the big metal block and set it at the end of this latest circuit. A door opens, revealing a chest with a Thunderblade inside.
Open the chest and grab your weapon. The first half of the Shrine is done, but there’s still more wiring to do.
Part 3: Moving Everything Across the Room
- Step 10: With Magnesis, carry both barrels and the large block to the other side of the room. Do them one at a time.
- Step 11: Take one barrel and follow the short path leading out from the central pylon. Place the barrel on this line.
- Step 12: Set the second barrel at the edge of that same line to extend the connection.
- Step 13: Here’s where the chest comes in. Grab it from the barred room and place it between the next two circuits as an additional conductor.
This forms a new line between two platforms just in front of the pylon. When it lights up, a gate opens to reveal another large metal block.
(Beginner tip: Yes, the treasure chest is metal, and yes, Magnesis can lift it. It’s easy to forget it’s a usable puzzle piece, so don’t leave it behind.)
Part 4: The Final Door
- Step 14: Pick up the new metal block you just unlocked.
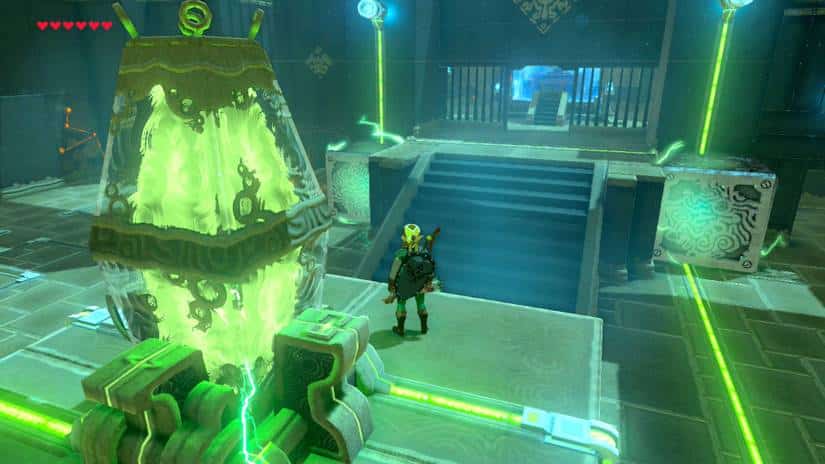
- Step 15: Take it to the throne room stairs and place it in the corner next to the bottom of the stairs. Once the current lights up, grab the block fixed between the two platforms.
- Step 16: Carry that block to the other side of the stairs and set it down there. With a large block on each side of the path leading to the altar, the final door opens.
- Step 17: Walk up and meet Daqo Chisay to claim your reward.
Lore-wise, the layout is a nice touch. The path to the altar is flanked by conductors, as if the Shrine itself is testing whether you understand how power flows from source to destination.
Rewards and Benefits
- Spirit Orb: You earn one from Daqo Chisay. Collect four and you can trade them for a Heart Container or Stamina Vessel.
- Thunderblade: A treasure chest weapon that electrocutes enemies. It’s great for Wasteland fights, though be careful when using electric weapons in storms.
- Fast Travel Point: Like every Shrine, it becomes a fast travel spot once you’ve discovered it.
- Practice With Magnesis: This Shrine is a solid warm-up for the more demanding metal puzzles later on.
(If you’re new to this: a Spirit Orb is the currency you earn from completing Shrines. You’ll trade them to a Goddess Statue to boost your health or stamina.)
Pro Tips
- Pro Tip 1: Work in order. Each lit circuit tells you where to go next, so follow the glow instead of guessing.
- Pro Tip 2: Match the object to the gap. If a barrel doesn’t reach, you probably need a block. If a block overshoots, try a barrel.
- Pro Tip 3: Don’t forget the chest. Once you’ve collected the Thunderblade, the empty chest is still a useful conductor for the second half.
- Pro Tip 4: Move one thing at a time. Carrying a heavy block across the room is easier when your hands aren’t busy with a barrel too.
- Pro Tip 5: Check your weapon slots. If your inventory is full, the game will ask you to make room before you can take the Thunderblade.
- Pro Tip 6: If you get stuck, reset by moving objects back to their start positions and retrace the glowing lines from the pylon outward.
Why This Shrine Matters
Daqo Chisay Shrine teaches one of Breath of the Wild’s most useful lessons: look at the whole picture. Each piece you move changes what’s possible next, and the solution only clicks once you see the pattern behind it.
It’s also a quick, rewarding stop on your way into Gerudo Town. You walk out with a Spirit Orb, a lightning-powered weapon, and a sharper sense of how circuit puzzles work.
Did the chest-as-conductor trick catch you off guard, or did you see it coming? Let us know in the comments, and tell us which Shrine puzzle gave you the most trouble so we can break it down next.