
Most shrines in Breath of the Wild ask you to think. Chaas Qeta Shrine asks you to survive. Waiting inside is a Guardian Scout IV, one of the toughest one-on-one fights in the Hateno region.
Don’t worry, you can beat it. This guide covers where to find the island, how to prep, and exactly what to do in each phase of the fight. Here’s the step-by-step.
Chaas Qeta Shrine Location and Overview
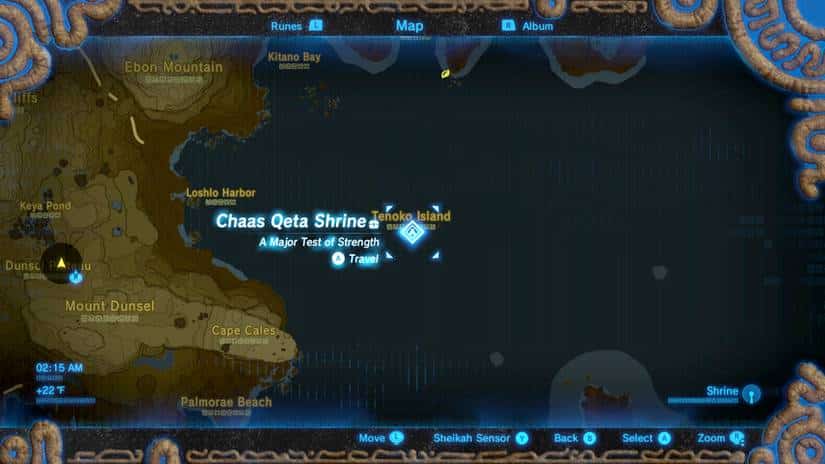
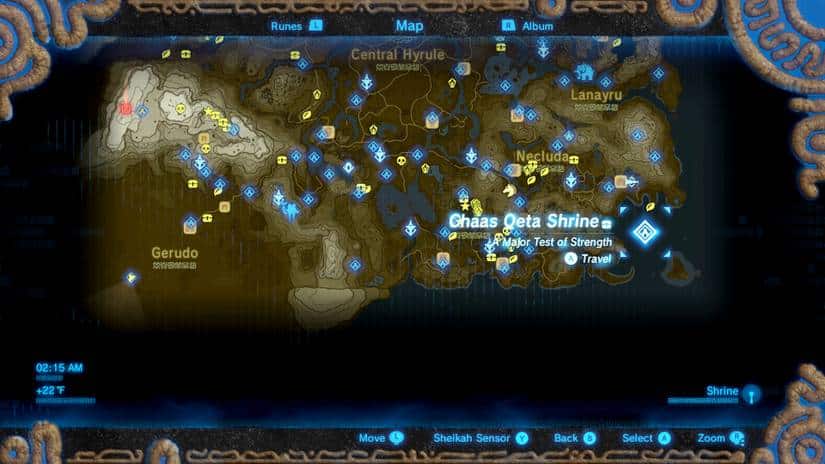
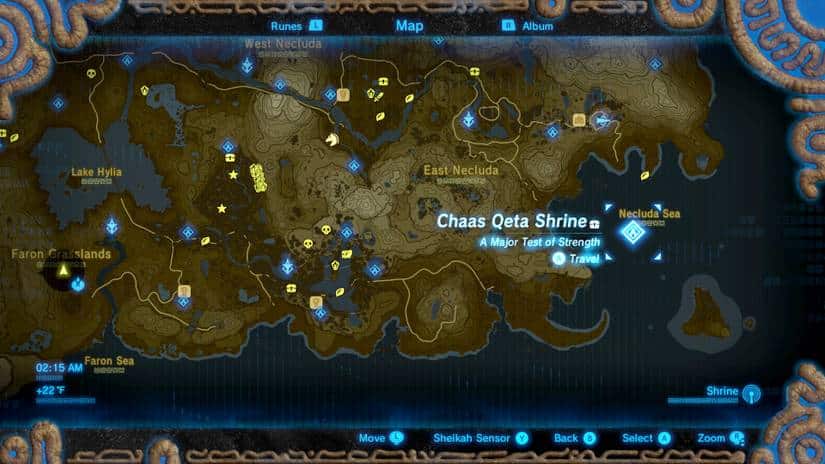
Chaas Qeta Shrine sits on tiny Tenoko Island, out in the Necluda Sea south of Hateno Village. You can spot it from the beach near the Hateno Ancient Tech Lab. The shrine’s trial is called A Major Test of Strength.
- Location: Tenoko Island, in the waters off the Hateno Tower region.
- Shrine Type: Combat trial. There are no puzzles, just you and a Guardian.
- Enemy: Guardian Scout IV, armed with a spear, an axe, and a sword.
- Enemy Health: 3,000 HP, which is a lot for this stage of the game.
- Getting There: Climb the nearby cliff and glide across to the island.
Quick beginner note: gliding means opening your paraglider (the Paraglider is the sail-like tool you get early on) while falling. Climb high, jump, and steer toward the island. Pick a tall starting point so you don’t fall short and land in the water.
(Pro tip: Save your game before you jump. A bad glide costs you time, and a bad fight costs you a lot more.)
Lore Note: Why a Guardian?
According to the in-game lore, Guardians are ancient Sheikah machines built to fight Calamity Ganon 10,000 years ago. Here, one of those machines serves as a trial instead of a threat. It’s a fitting test, since the Sheikah designed these shrines to prepare a hero for exactly that battle.
How to Beat the Guardian Scout IV: Step-by-Step
The numbers tell an interesting story: 3,000 HP means this fight is a marathon. Your weapons will break, so prep matters as much as dodging. Spend a few minutes getting ready before you step inside.
Before You Enter: Preparation
- Step 1: Fill your health and eat a defense-boosting meal, such as Tough Steamed Meat. (If you’re new to cooking, you just toss ingredients into a pot over a fire and the game makes the dish.)
- Step 2: Add a damage-boosting snack or elixir if you have one. Every bit of extra damage means fewer weapons lost.
- Step 3: Stock up on strong weapons. Ancient weapons and the Master Sword work best, and a single ancient weapon will break long before the Guardian goes down.
- Step 4: Pack disabling tools like ice arrows or an electricity-filled weapon such as the Thunderblade. These stun the Guardian and open it up for big hits.
Here’s a quick breakdown of your best options:
| Tool | Role in the Fight | Why It Helps |
|---|---|---|
| Ancient weapons | Main damage | Hit hardest against Guardians |
| Master Sword | Main damage | Strong choice against Guardians |
| Ice arrows | Disable | Freeze the Guardian for a few seconds |
| Thunderblade | Disable | Electricity temporarily stuns it |
| Tough Steamed Meat | Defense buff | Reduces damage from heavy melee hits |
The Fight: Phase by Phase
- Step 5 (Opening Melee): Stay mobile and dodge the Guardian’s spear, axe, and sword swings. Its melee attacks hit very hard, so rush in only when it finishes a swing.
- Step 6 (Stun and Strike): Hit it with an ice arrow or electricity weapon to disable it. Then swap to your strongest ancient weapon and unload while it’s helpless.
- Step 7 (Running Spin): When the Guardian retreats and charges a spin attack, duck behind a pillar. Pop out and counterattack once it ends.
- Step 8 (Halfway Laser Spin): Around the midpoint, it crouches and spins a laser in a circle. Back off and fire arrows from a distance to disable it, or use the updraft to glide over it and strike from above.
- Step 9 (Final Double Laser): Near the end, it charges a laser that fires two shots in a row. If its health is low, rush in and finish it before it fires. If its health is still high, keep running and dodge both shots.
Quick beginner note: a flurry attack is a slow-motion window you trigger by dodging at the last second. Dodge just as an attack lands, then mash the attack button for a burst of free damage. It’s the best way to chew through 3,000 HP.
(Pro tip: When the laser charges, get in close and circle around it. You’ll avoid the beam and can hit it while it recharges.)
Rewards: What You Get
Once the Guardian falls, the fight is over. Don’t rush out just yet, because the Guardian drops some of the best loot in the area.
- Step 10: Pick up everything the Guardian dropped, including an Ancient Battle Axe ++ (Damage 60) a Guardian Spear ++ (Damage 20) and a Guardian Sword ++. You’ll also get ancient materials.
- Step 11: Run ahead and open the treasure chest for the Climbing Gear.
- Step 12: Speak with the monk, Chaas Qeta, to receive your Spirit Orb.
Climbing Gear is a handy armor piece that speeds up your climbing. It’s a solid pickup if you’re scaling the cliffs around Hateno. Check out the full set if you collect more pieces.
Lore note: the ancient materials you collect aren’t just junk. You can trade them in at the Hateno Ancient Tech Lab to upgrade your Sheikah Slate, which links this fight back to the tech that built the Guardian.
Pro Tips for an Easier Fight
- Pro Tip 1: Bring more weapons than you think you need. Running out mid-fight is the most common way to lose here.
- Pro Tip 2: Use disabling attacks every time they’re available. Ice and electricity create safe damage windows, which means fewer hits taken.
- Pro Tip 3: Use pillars as cover. They block the running spin attack and give you a breather to heal.
- Pro Tip 4: Pay attention to its health bar. Whether you rush or dodge the final laser depends on how much HP it has left.
- Pro Tip 5: Upgrade your armor and hearts first if you’re struggling. This is among the tougher enemies in the game, and there’s no shame in coming back later.
(Pro tip: Swapping weapons mid-fight is quick through the pause menu, and time stops while you do it. Use that to switch to a fresh ancient weapon before the old one breaks.)
Why This Shrine Matters
Chaas Qeta is a great test of everything you’ve learned. You dodge, use flurry attacks, manage weapon durability, and read enemy patterns. It also hands you strong ancient weapons, a useful armor piece, and a Spirit Orb.
It’s also a good preview of the Guardian encounters you’ll meet later in Hyrule. If you can beat a Guardian Scout IV, the smaller ones will feel a lot easier.
So how did your fight go? Did you rely on ice arrows, rush in with ancient weapons, or glide over it with the updraft? Share your strategy in the comments and tell me how many weapons you broke along the way.